
Yarn Design Time with the SK155 Knitting Machine
Posted by Angelika's Yarn Store on Dec 31, 2018
Design Time with the Silver Reed SK155 Knitting Machine
How I spent the weekend machine knitting
Secrets into my design time on my Silver Reed SK155 Bulky Knitting Machine. A peek into how I approach, test yarns and create designs.
Because the 2018 Holiday fell on Tuesdays, we had an extra day off work. I further gifted myself that I would not go into work on Monday to do administrative work. Instead I packed up the Silver Reed SK155 knitting machine.
Before leaving work on Saturday, I spent a pleasant quiet hour perusing my remnant drawer and yarn on the shelves. I came home with Cascade Pacific (worsted [4]), Wonderland Yarns March Hare (worsted [4]), Cascade 128 Superwash (bulky [5]), Plymouth Encore Chunky [5], Ella Rae Seasons and Cascade Cherub Chunky (both light bulky [4/5]) yarns.
Being a hand knitter, my first goal is to find the tension on the knitting machine that will give me the same gauge as the ball band suggests for hand knitters. I start in a very unusual way. I start by doing the math to find how many stitches should equal 8 inches. For instance, if the ball band says that 3.5 sts equal 1 inch, then 8 inches should be 28 sts.(3.5x8) So I will cast on 28 sts and knit about 40 rows. I drop from the machine, pull the top and bottom to snap the stitches, and gently unroll trying not to stretch it, and measure the width. If the sample isn't 8" wide, I bump up the tension dial to a larger number.
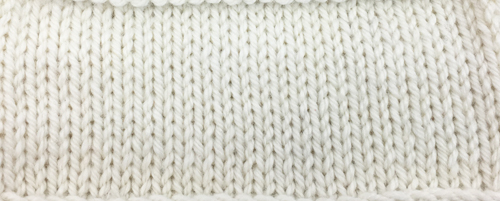
My first test was with Plymouth Encore Chunky [5]. The SK155 is the best machine for this size of yarn. I started at tension dial 7, and the swatch ended up 7", so after making that note, I unraveled and did another at tension dial 8. But it only measured 7.5". Increasing the tension dial to 9 made a perfectly 8" wide swatch. Success!! That was fun!
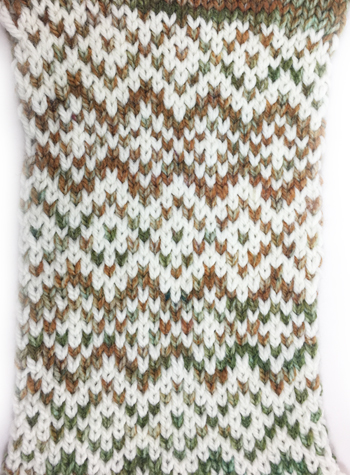 Next is to see if I can get that same gauge in fair-isle. Continuing with the Encore Chunky, I selected one of their Colorspun colors for the 2nd color. Tension 9 only gave me 6" (which is 4.7 sts/inch), and the carriage was sticking along the way. I increased my tension to 10, and added more weights, with minimal improvement. The carriage continued to balk, and my width only increased to 6.25" (which is 4 sts/inch). I looked back at a swatch I had done years ago. Measured it, and it only worked up to 4.25 sts/inch, and this swatch was done at tension 10++, which is the maximum setting. So maybe Encore Chunky is a bit thicker than I thought.
While my tests of getting fair-isle to knit to 3.5 sts/inch was not successful with this yarn at this time, I did end up with swatches that would make wonderfully thick cardigans and jackets. Good to note and save. Those swatches can end up in a future pattern. But be sure to label those swatches securely and completely for future reference.
Instant Gratification Needed!
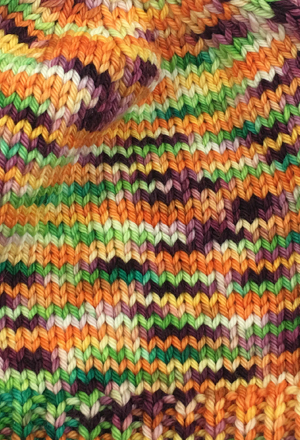
Wanting to get my hands on a brightly colored worsted that was calling my name, I decided simple gratification was required.
I wound up a hank off Wonderland Yarns March Hare, in colorway Tiger Lily 110.
After doing up the 8" swatch to get the hand knit stitch gauge, I also measured for row gauge. That is important on a knitting machine, because you can't measure the length on the machine because it is stretched. So you need to know ahead of time how many rows you need.
Here are my unproofed notes for this hat.
Tension Dial at 5. Tension on mast at lowest setting.
Gauge was 4.5sts/inch & 5.75rows/inch.
Size: Adult Medium. Perfect for heads that measure no less than 21.5" (and up to 23").
Refering to page 38 on the SK155 manual for K1 P1 ribbing. Cast on 86 sts. (leave a tail long enough for seaming the hat up.) Tension 3, and following SK155 manual, knit those 3 rows on every other needle. Pull all needles into work and knit 10 rows. Reform those stitches as shown in the manual.
Reset the row counter to zero. Reset tension dial to 5.
Knit 32 rows. This is a generous length and good for larger sizes, but if you want a closer fit, try only 28 rows.
Now comes the crown shaping. Since this is knit flat, we will need to seam it up. I use a full stitch for the salvage to create a fairly invisable seam. Ignore the 1st stitch-pretend its not there!
Working in groups of 6, *using a single prong transfer tool, move the 1st stitch onto the 2nd stitch. Skip 4 sts.* And repeat all across the bed. Push empty needle back out of work. You will have an empty needle, and 5 sts all across the bed. Knit 2 rows.

Working in groups of 5, *using a single prong transfer tool, move the 1st stitch onto the 2nd stitch. Skip 3 sts.* And repeat all across the bed. Push empty needle back out of work. You will have an empty needle, and 4 sts all across the bed. Knit 2 rows.
Using your transfer needles (1, 2 or 3-whichever is most comfortable) transfer stitches in toward the center filling in the empty needles. This will take multiple transfers. Should have about 58 sts total.
Working in groups of 4, *using a single prong transfer tool, move the 1st stitch onto the 2nd stitch. Skip 2 sts.* And repeat all across the bed. Push empty needle back out of work. You will have an empty needle, and 3 sts all across the bed. Knit 2 rows.
Working in groups of 3, *using a single prong transfer tool, move the 1st stitch onto the 2nd stitch. Skip 1 st.* And repeat all across the bed. Push empty needle back out of work. You will have an empty needle, and 3 sts all across the bed. Knit 2 rows.
Using your transfer needles (1, 2 or 3-whichever is most comfortable) transfer stitches in toward the center filling in the empty needles. This will take multiple transfers. Should have about 28 sts.
Working in groups of 2, *using a single prong transfer tool, move the 1st stitch onto the 2nd stitch.* And repeat all across the bed. Push empty needle back out of work. You will have an empty needle, and 1 st all across the bed. Knit 2 rows. Cut yarn leaving 12-15". 16sts.
Using a large eye tapestry needle, gather up the stitches off the needles. I like to run around those loops a second time.
Run a very thin knitting needle through cast on of ribbing. Bunch it up and pull lengthwise. A bit of heavy steaming on this pure wool will help to set those ribbing stitches. If you do steam it, let it dry completely before seaming up the side.